Entries in Decadence (12)

Monday
Jul042011

Roasted Raspberry Meringue Tart or How to Use up all Your Frozen Berries

As you may or may not know, I have a little thing for a certain food and travel magazine. The pictures, the articles, the recipes are all exactly how I want to cook every single day. You may or may not also know that, having spent a winter away, my craftily squirreled away stash of summer fruit is still largely intact. 

Summer fruit is starting to come along here and I have been having a little panic about how to use up what I have. 

I also have been fancying a recipe for a Rhubarb and Raspberry Meringue Tart in a certain food and travel magazine since returning from San Diego to a stack of six issues. This graced the cover and has had Poppy oohing and ahhing over what she calls its marshmallow top since first spotted back in April.
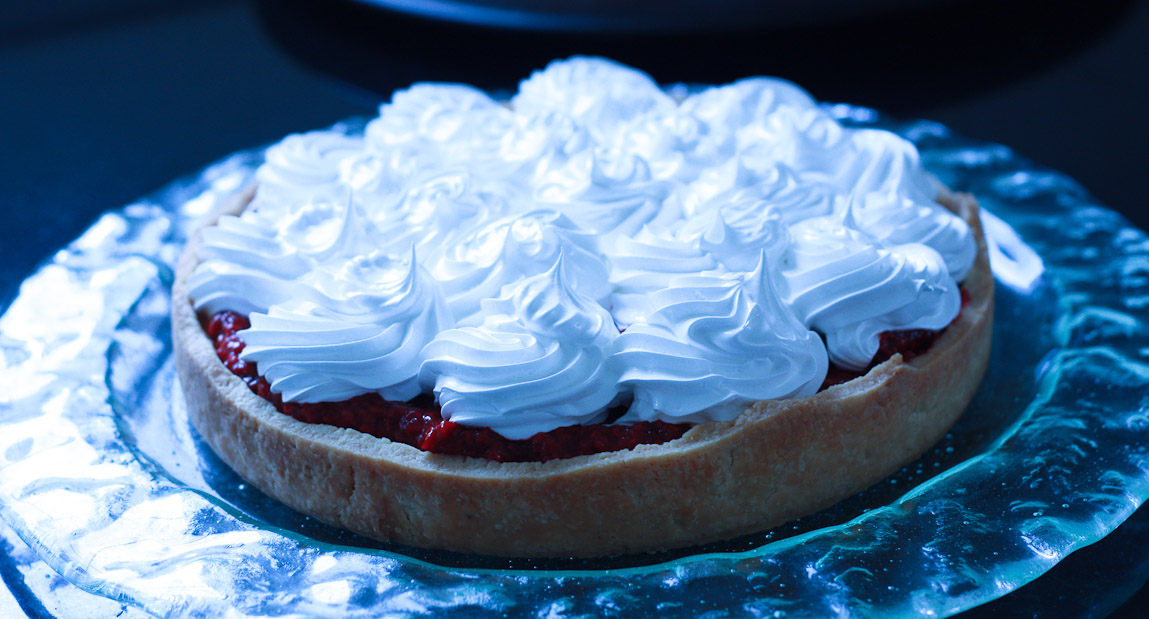
So, while I love this magazine, I have to come to terms, on a monthly basis, with the fact that, depending on how you choose to look at it, I get it six months early or late because of Australia being in the Southern Hemisphere and all. I also have to come to terms with the fact that, upside down seasons aside, certain things are never going to be in season plentifully together here; things like raspberries and rhubarb.

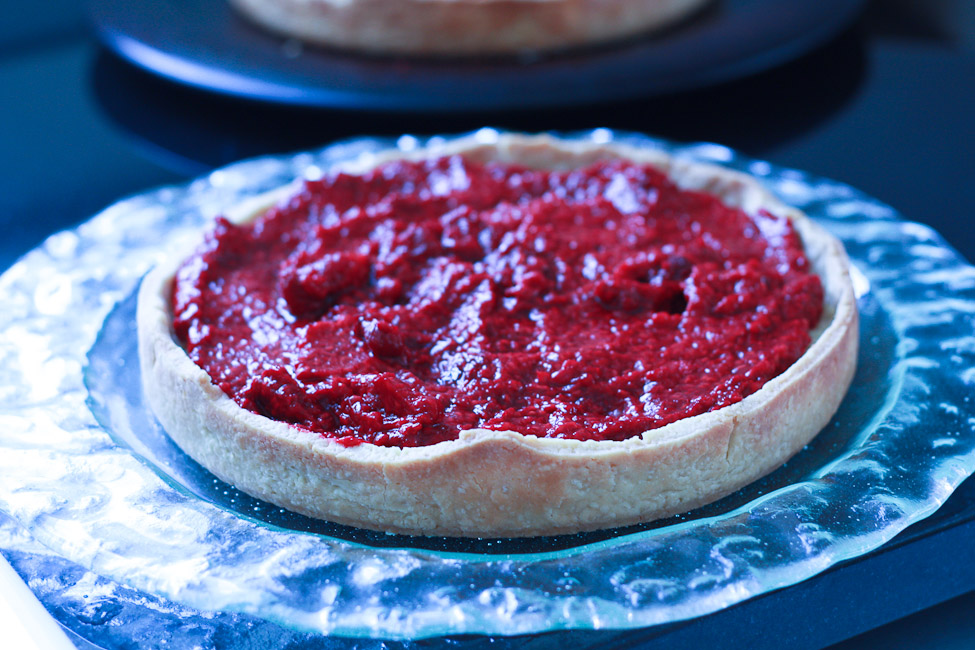
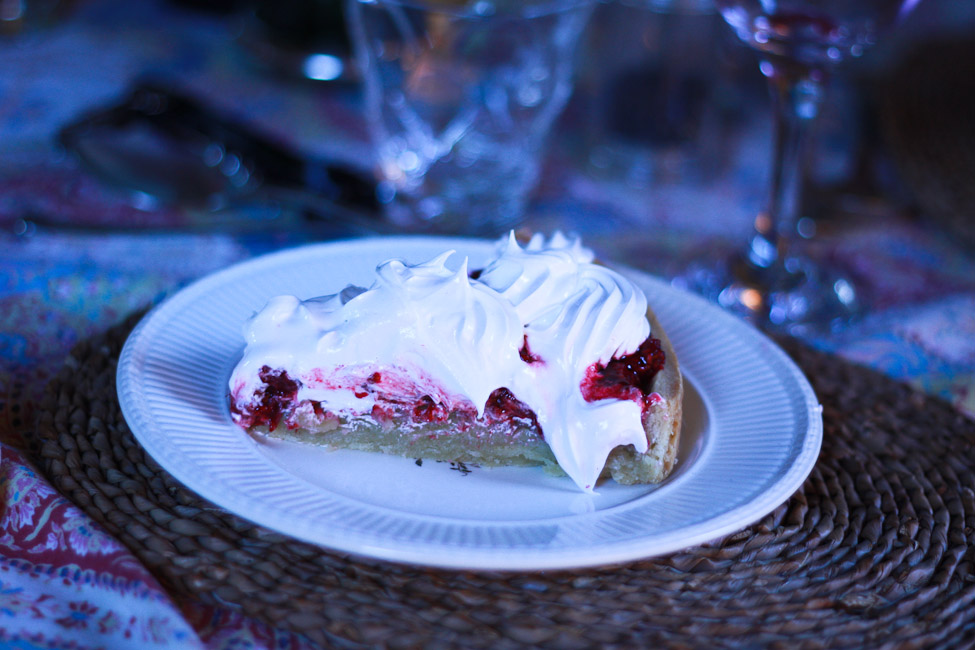
Our tart would be plain raspberries, and I would roast them with some sugar and lemon and hope that it wasn’t a complete mush in the end. It was but it was damn tasty mush and it was really nicely tart so that the italian meringue, or marshmallow top, didn’t make an overly sweet pud. The frangipane makes a delicious little tart all on its own and topped with the berries alone would be a really nice little take on a Bakewell tart but the meringue, the oh-my-god meringue elevates the whole thing way beyond the humble Bakewell.

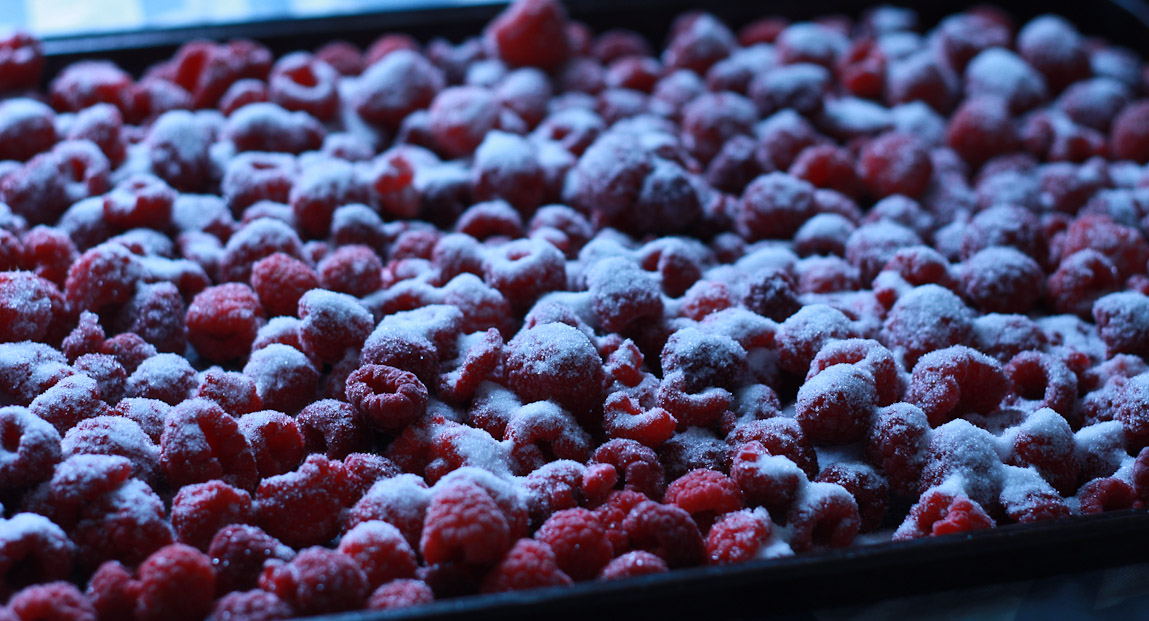
I used frozen raspberries and made a double recipe (two tarts) so I freed up a lot of freezer space. You can use fresh and it will be less jammy if you treat them gently. You may be able to reduce the ‘roasting’ time as well. If you are using fresh berries, you could skip the cooking altogether and make a little raspberry syrup or coulis, toss the berries with it and pop them on top of the frangipane. I think you would need to eat it pretty quickly in that case as well, not that that should be an issue.

This tastes really and truly delicious and it is so pretty that you almost don’t want to cut it. But do, because you will be happy and happy and happy.
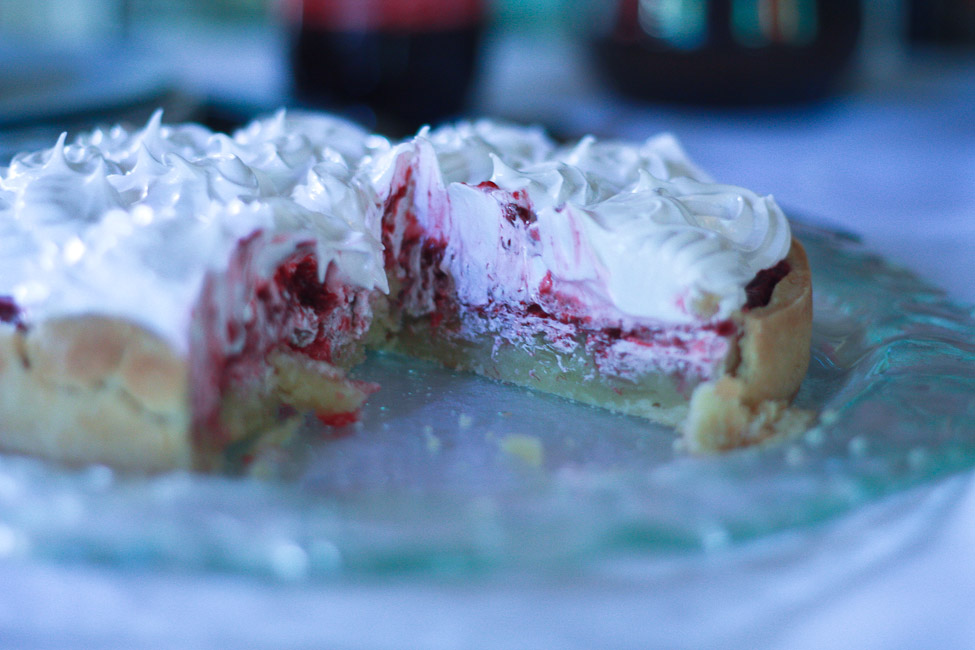
I’ll apologize now because taking lots of process shots seems to have gone the way of sleeping past 6:30 am, showers and not asking a toddler whether they need to use the potty every twelve minutes.

Roasted Raspberry Meringue Tart adapted from Australian Gourmet Traveller

Pastry

180 grams softened butter

40 grams icing sugar

2 egg yolks

250 grams plain flour

Beat butter until pale, add sugar and stir to combine. Add the egg yolks and 1 tablespoon chilled water. Sprinkle flour over and stir to just combine. Knead a few times on a floured surface. Wrap in plastic wrap and chill in refrigerator (+/-1 hour).

Frangipane

75 grams softened butter

80 grams granulated sugar

70 grams almond meal (ground almonds)

1 tablespoon booze (the recipe originally called for brandy, I used Grand Marnier)

2 eggs

50 grams slivered almonds

Beat butter and sugar until creamy and pale. Add the almond meal, booze and eggs. Stir just to combine and then stir through the slivered almonds. Refrigerate to chill (+/- 1 hour).

Roasted Raspberries

4 cups frozen raspberries (still frozen)

1/4 cup sugar (if you love sweet sweets then just bump the sugar up a bit here)

Finely grated zest of 1 lemon

Preheat oven to 400º. On a large baking sheet, arrange berries. Sprinkle with sugar and roast until outer edges start to caramelize. Gently stir or toss berries and return to oven. When the edges start to caramelize again, remove from oven and allow to cool. Strain any extra juices off and save to serve. Gently stir through the lemon zest. Allow to cool.
Roll out the pastry and line a 22 cm tin with a removeable base. I used a springform pan. Trim the edges and prick the bottom with a fork. Rest, in refrigerator, for one hour.

Heat the oven to 350º. Blind bake the tart case (line it with parchment and weigh it down with baking weights or some dried beans) for about 20 minutes, until light golden. remove the weights, or beans, and the parchment and bake for a further 10 minutes or until golden.
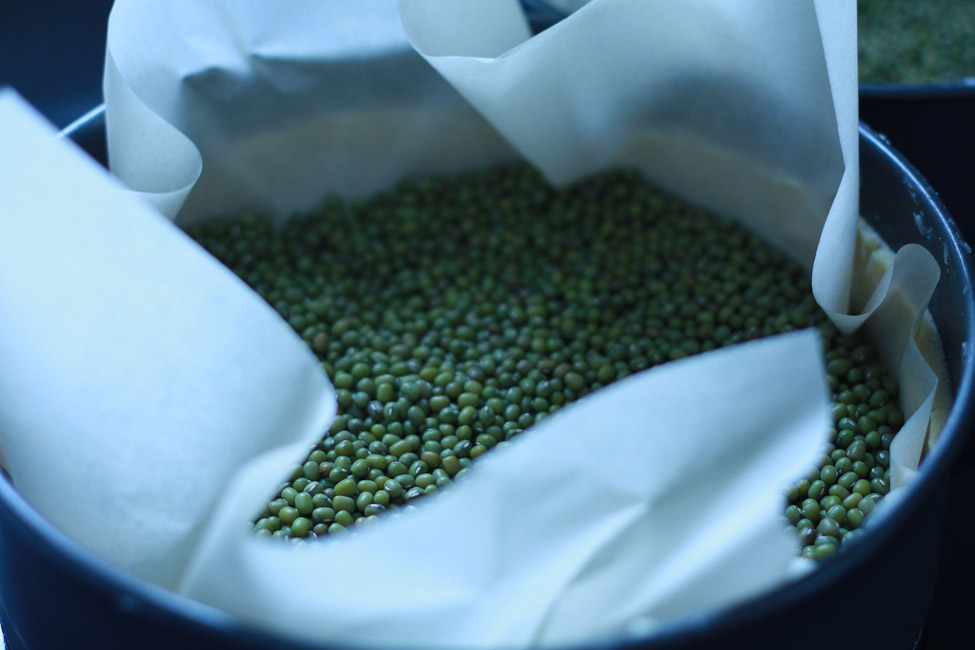
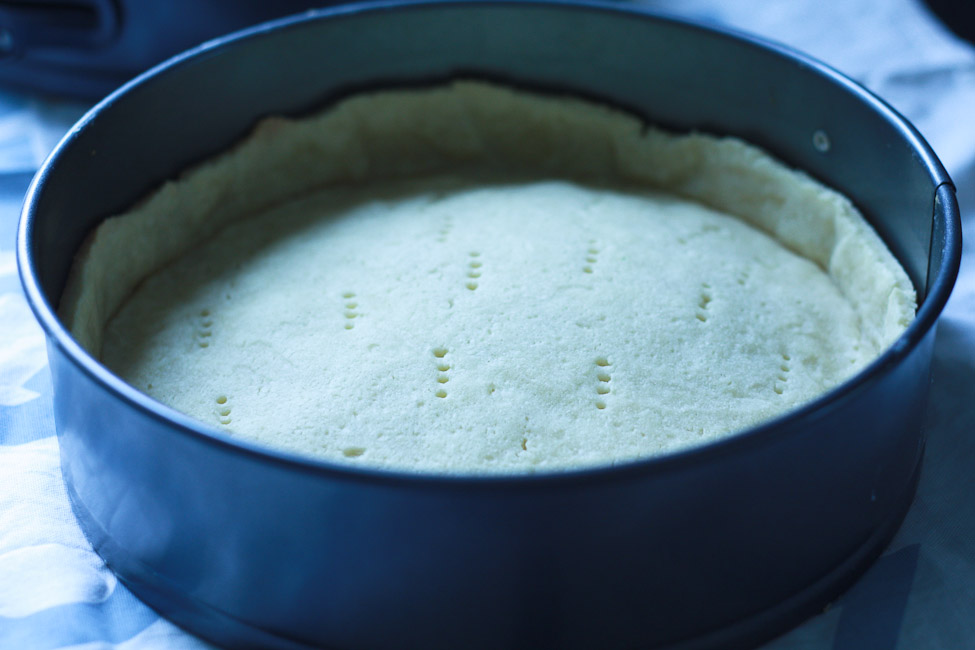
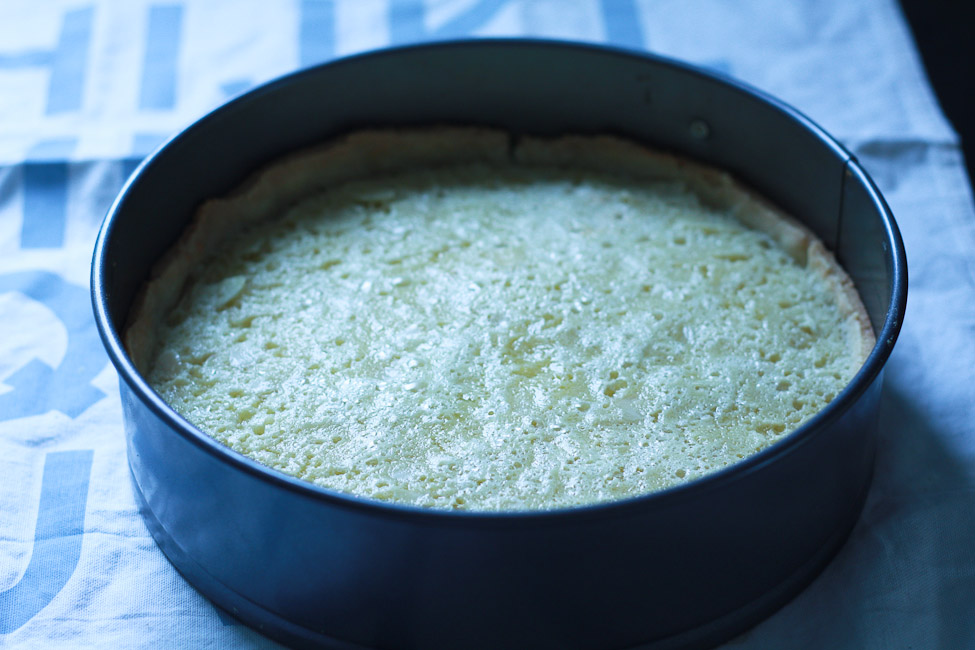
Spoon the frangipane into the tart case and bake until it is set and golden, about 15 minutes.

Cool just until firm and remove from tin.

Italian Meringue

175 grams granulated sugar

2 egg whites

Pinch of cream of tartar

In a small saucepan, add 60 ml of water to the sugar and heat gently until all sugar is dissolved. Increase heat and cook until temperature is 121ºc on a candy thermometer, this is pretty much the firm ball stage in the world of candy cookery. Meanwhile, beat the egg whites and cream of tartar until soft peaks form. Slowly drizzle the sugar syrup into the egg whites while the mixer is on and beat for 10-12 minutes until cool. The meringue will be glossy and firm.

While the meringue is whipping, spoon the raspberry mixture onto frangipane. Top with the meringue, pipe it if you have the means, otherwise a spoon and some swirls will be just perfect.

Serve drizzled with a little extra syrup if you like.
Wednesday
Jun082011

Rhubarb Ripple Ice Cream - Rhubarb Trilogy 2011 - Part II

Encouraged by David Lebovitz and his The Perfect Scoop, I have been making ice cream recently. I don’t love ice cream but I do have an ice cream maker which caused no small amount of post purchase depression. Consequently, I have fits and spurts of determination to use said machine.

Turning the pages and looking at perfectly scooped bowls of creamy indulgence, some beautifully swirled with bright fruit purées, I got to thinking about how uncommercial rhubarb is. Why is there no rhubarb ice cream next to the Black Raspberry Cheesecake and the Rum Raisin? I would stand up for the humble rhubarb and create the next ice cream sensation, Rhubarb Ripple.  

Instead of using the same recipe I have used for years for vanilla ice cream, I thought, since I was already reading it, I would use one from The Perfect Scoop. I followed the ingredient list perfectly and then forgot or didn’t bother to read the recipe instructions and carried on my way, happily ignoring the published directions and making it the way I would have made it anyhow. Regardless, it is perfect and delicious and not crazy sweet and the perfect foil for the rhubarb compote I was going to swirl through.

I would recommend, if you are really caught up in appearances, or taking pictures of your work for your blog, that while you split your vanilla bean, you watch what you are doing. Don’t watch your toddler scaling the kitchen cupboards or you will wind up with something like this.

Or, better yet, put down your knife and rescue your toddler from her tenuous toe hold on the edge of the drawer. In hindsight, you and your kitchen units will be happy you did.

Rhubarb Ripple Ice Cream (with some help from David Lebovitz and The Perfect Scoop)

Vanilla Ice Cream Base

1 cup (250 mL) whole milk

2 cups (500 mL) whipping cream

3/4 cup sugar

1 vanilla bean, split lengthwise

6 large egg yolks

Pinch of salt

Rhubarb Ripple

4 cups chopped rhubarb

1 cup granulated sugar

4 tablespoons (1/4 cup) lemon juice

Scrape out the seeds of the vanilla bean and add to a large saucepan with the milk, cream and sugar. Gently bring to a boil. Immediately remove from heat.


Beat egg yolks and pinch of salt in a bowl and slowly pour about a third of the hot cream mixture into the yolks, whisking all the time. 

Slowly pour the yolk mixture back into the pan with the remaining cream whisking all the time.

Return to the stove and over a low heat, stirring constantly, cook until the mixture coats the back of a spoon. You can test by running a finger through the mixture on the back of the spoon. It should hold the path left by your finger.

Pour the mixture into a bowl and chill.

Put the rhubarb, sugar and lemon juice in another medium saucepan and bring to a boil. Reduce heat and simmer, stirring occasionally, until the mixture is thick enough to hold a track in the bottom of the pan when you run a spoon through it. As the mixture thickens, you will need to stir it more frequently to prevent burning. It will be thick and syrupy and will measure just shy of 1 1/2 cups when it is properly cooked down.

Pour into a bowl and chill.

Freeze the ice cream base in an ice cream maker according to manufacturer’s instructions. If you don’t have an ice cream maker you can try it the way I explained here.

Put a large metal mixing bowl in the freezer to chill while the ice cream is freezing.

When the ice cream is frozen, transfer it to chilled bowl and quickly fold/swirl/gently stir about 1 cup of the rhubarb mixture in. You don’t want to fully incorporate it it, you want to keep the rhubarb in swirl or ripples. You also want to do this as quickly as possible to prevent as much melting as you can.

Immediately transfer to the freezer to set up again.

Commercial, it may not be but delicious, there is no question.


Sunday
Apr172011

Chocolate Paté - Happy Birthday Pops!

My dad’s birthday is today. He is turning 60. 60 years young, he would say. My dad has taught me some pretty valuable lessons in the past few years.

He has taught me the value of being unconditional with those you love. I missed that for a long while. Along with that came learning the value of being loved unconditionally. He has taught me that sometimes it is okay to give in and to admit that you can’t do it all. He has taught me that it is okay to receive and that sometimes just being thankful is enough. He taught me that we don’t always have to agree to have a relationship. He has taught me that even when we haven’t seen each other or spoken in an age, that there is always someone who will listen and enjoy or talk and disagree or just say, ‘thanks for sharing that.’ He has taught me that I am stronger than I think I am.

He has taught my daughters a few things too. They have learned that he is a little crazy sometimes but that he loves them, even when they don’t want a bar of him and that that in itself is okay. He has taught Poppy how to drive, the windshield wiper controls and horn being an integral part of those lessons. His alter-ego, Stewart Martha, has taught them how clean a floor should be to eat off of. Most importantly so far, for them, he has taught them that chocolate is a food group on its own and that, when part of a meal, one should always eat it first so as not to spoil it by the lingering flavours of anything else or, heaven forbid, by not having enough room at the end of a meal. 

With that in mind, the girls and I set out to make what is potentially my dad’s favourite food, chocolate paté. I have made it for him before, in various guises. I once put some dried sour cherries in it which were eaten, but to his mind were definitely not proper, interfering with what was meant to be a chocolate experience. The nuts were greeted in much the same way. White chocolate would be unthinkable and milk chocolate is just about tolerable. 

Finding the recipe we would use became a challenge but I eventually happened upon a Bernard Callebaut recipe which, with a few tweaks was going to be just fine. I omitted the white chocolate layer. I kept the milk chocolate layer because the dark chocolate I was using needed a sweet lift for this to really be perfect, and so that my children would eat it. I normally make a baked, in a water bath, chocolate paté which uses eggs but it also uses 1 1/2 pounds of chocolate and makes a ton. It was not an eating challenge I felt the girls and I could, or should, take on. A big plus was the simplicity of this recipe. Sometimes you just can’t be worrying about temperatures and timing and with this, in three hours you have something amazing.

What came out was a little lighter than a usual paté but no less chocolatey for it. The Just Us chocolate I used was perfect. The dark gave a smoky depth and the milk chocolate had a caramel note that was the perfect foil for the barely sweet dark. I macerated some raspberries, which means I added some sugar and let them sit for a bit, and served it with that and some white chocolate sauce. You could do that or purée the berries and pass them through a sieve to remove the seeds for a finer presentation. With white chocolate or not is up to you as well. Some like it served with a dollop of whipped cream. In Cornwall, it would have a blob of the ubiquitous clotted cream. Really, I think, anything goes.

The only note on the method I would like to add is that of you stop to take photos, distribute evenly sized spoon licks to onlookers or otherwise faff about during the folding in of the cream, you too will likely end up with some tiny little chips of chocolate in your paté. They taste great but don’t help in the achieving of a silky smooth texture.

With all that, Happy Birthday Dad/Papa! 

Chocolate Paté (adapted from Bernard Callebaut)

200 grams good quality milk chocolate chopped

200 grams good quality dark chocolate chopped (try for at least 70%)

3/4 cup unsalted butter 

2 cups (500 ml) heavy (whipping) cream

Line a 22 x 11 cm loaf pan with cling film.

Melt each of the chocolates separately in a double boiler. When melted add 1/4 + 1/8 cup butter (1/2 of what the recipe calls for) in each, stir until butter is melted. Remove from double boiler and heat and let cool to room temperature.

When chocolate mixtures are cooled, whip cream to soft peaks. Divide evenly between the two chocolates and gently fold the cream into each chocolate.


Spoon the milk chocolate mixture into the pan, tap gently to, hopefully, get rid of any big bubbles and smooth top. The do the same with the dark chocolate layer.


Cover it with cling film and refrigerate for at least two hours.

Carefully unmold by gently tugging on the cling film lining the tin and invert it onto a plate.

With a hot knife (put the knife in a container of hot water for a few seconds), slice the paté.

Put slices on a plate and serve with some macerated raspberries or raspberry coulis and/or some white chocolate sauce.


Friday
Mar252011

THE. BEST. CHOCOLATE. CHIP. COOKIES. - Really,They are That Good

I have one sentence for you. It is really quite simple. No fuss, no muss, just one little sentence that may just change your life, or at least your baking. These are the best chocolate chip cookies ever. Yes, I said EVER.

The recipe hails from a New York Times article from 2008. Before you get all excited thinking I have the time to read the New York Times and how you must have my time management tips and secrets, I don’t. I was just lucky enough to stumble upon Orangette, who wasn’t reading the New York Times either, but has a news-reading friend who told her she needed to read this article.

If you care, at all, about cookies or baking or recipe development or Dorie Greenspan, who, along with David Lebovitz (I know I’m name dropping but I love them), is teaching me how to make perfect macarons, then you should read the original article by David Leite. If you care about them being really beautiful, and arranging the chocolate pieces, Jacques Torres uses made-especially-for-him fêves, chocolate disks that create layers of chocolate through the cookie, so that they are just so, you can do that to. All I know is that Torres clearly does not have twenty fingers reaching up from between him and the countertop trying to pinch his cookies while he arranges his fêves. I eliminated this challenge by using really good quality chocolate chips which tasted just fine.

Now, not all, but lots, maybe even most good things come with a caveat. Some make it a deal breaker and, to be honest, it almost was for me. I wasn’t sure we, pretty much meaning me, could cope with a bowl of cookie dough sitting in our fridge. Yes, that’s right, sitting in our fridge for thirty-six, that’s 3-6, hours. It may seem like an age, especially when you are waiting for cookies, but you can just push it to the back and come back a day and a half later. 

Do it. Don’t let the time defeat you. You will love them. They are delicious. They are crispy. They are chewy. They are salty sweet perfection.

As I mentioned, I used chocolate chips instead of disks. Try and use the best quality you can find or afford. I used fine sea salt instead of coarse salt in the dough, I couldn’t see that this would make a difference. I used Maldon sea salt for the tops. The original recipe is given in cups and in ounces. I used cups because I don’t have a scale here in San Diego. My cookies were a little smaller than the recipe wants.

The. Best. Chocolate. Chip. Cookies. adapted from Jacques Torres, David Leite, Orangette (makes about 28 4-inch cookies)

2 cups minus 2 tablespoons cake flour

1 2/3 cups bread flour

1 1/4 teaspoons baking soda

1 1/2 teaspoons baking powder

1 1/2 teaspoons fine sea salt

1 1/4 cups unsalted butter

1 1/4 cups light brown sugar

1 cup plus 2 tablespoons granulated sugar

2 large eggs

2 teaspoons natural vanilla extract

3 1/4 cups good quality chocolate chips

Maldon sea salt

Sift flour, baking soda, baking powder and salt together.

Cream butter and sugars together for about five minutes, or until very light.

Add eggs, one at a time and mix well after each egg. Beat in the vanilla.

Add the dry ingredients and mix until just combined. 

Mix the chocolate in. 

Press cling film against the dough and refrigerate for 36 hours, or up to 72 hours.

When you are ready to bake, preheat oven to 350º.

Scoop large golf balls of dough onto the baking sheet a couple of inches apart.

Sprinkle each with sea salt and bake until browned but still soft. It took about 16 minutes for me, you will want to keep checking.

Cool on baking sheet for ten minutes, then transfer to a cooling rack.

Repeat until you have baked all your dough. Eat, you may want to use a napkin.

Tuesday
Feb012011

Good Bad Cookies

There are times when life gets in the way of pretty much anything else. Visitors, and lots of fun, and travel, and lots of fun, and trying to clean your house up into the no-really-this-is-how-we-live-our-children-don’t-make-mess state required for potential buyers to be able to consider living there gets in the way of just cooking dinner, much less writing about it. Now that the house is tidy and we seem to have tracked down all the odors emanating from behind furniture and all the,’ Oops, I appear to be stuck,’ patches have been scraped off the floor and we have returned from what seemed like a cross country road trip which was, in reality, just a few hundred miles up the coast, and our fridge is empty of leftovers, I am back in cooking mode. At least until my new, but not particularly successful, knitting hobby takes over.

Shortly after New Year and in the midst of my determination to not resolve to do anything, I realized that I had to do something with the jar of a certain chocolate-hazelnut spread that someone, silly person, had put in Stephen’s Christmas stocking. Left on its own, it was going to meet no better end than a teaspoon straight into someone’s waiting, and knowing better, gob. At least if I baked it up into something else, it would disperse the no-goodness and it could be more easily shared around.

I made the cookies but I couldn’t post them, too many resolutions would be swearing them off. Something this bad but good needed an audience. So, I waited and, well, I have waited long enough. It is February people (at least it feels that way at home, I am told), and you all need something to do on your snow days (I miss snow days, I really, really do). Plus, you will deserve them after all that shoveling (I miss shoveling, really I do). Plus, if I had some snow to shovel, I would then deserve to eat more of them.

Peanut Butter and Chocolate Hazelnut Spread Cookies

1 1/4 cup crunchy peanut butter

1 cup brown sugar

1 large egg

1 teaspoon vanilla

3/4 cup flour

1 teaspoon baking soda

1/4 teaspoon salt

3/4 cup chocolate chips

1/2 cup chocolate hazelnut spread

Preheat oven to 375ºF.

Beat peanut butter, brown sugar, egg and vanilla together. 

Mix flour, baking soda and salt in another bowl. Mix in to wet ingredients.

When wet and dry are fully mixed, stir in the chocolate chips and chocolate hazelnut spread.

Roll into balls and place on baking sheet lined with parchment. Flatten with a floured fork. 

Bake for about 10 minutes. Careful, these are pretty easy to overbake.

Cool.

Makes about 24.

Monday
Dec272010

Pre-Resolution Pennies

A few days ago, I found myself channeling my inner 1950’s housewife, the one with the perfectly starched, immaculately clean apron and not a hair out of place. Not the one I more closely resemble, with no apron and floury wet handprints on my butt - the result of a misplaced towel, and hair that resembles that Hallowe’en wig in the bottom of your dress up trunk but with the added dimension of whatever your child ate for breakfast smeared on one side and toothpaste in the ends of the other. It’s a glamorous job I do.

I was tidying up the cheese drawer, trying to make some space for all the cheese we need to have for Christmas. There was a chunk of prematurely purchased Christmas stilton that needed using up and, maybe it is because I have been trying to be so good and not eat such things lately, the thought of the best way to make cheese more fattening came to mind. I needed to make cheese pennies. You know, the ones you have eaten at least a dozen of before you can say, ‘A moment on the lips...‘. 

Ours would be stilton cheese pennies and we would throw some nuts in and then they would be very delicious with some port, the port you need to have because it is Christmas. You know, to go with all the cheese.

It’s not a new idea. It has been done way more than once, usually called Stilton Shortbread or Stilton and Walnut Cheese Dubloons or something else to make them sound all fancy. And, even though they are but humble cheese pennies, I can see why people try to give them this exalted status with flowery names. They certainly didn’t make it to Christmas Day here.

I managed to save enough to include in our Christmas goodie bags we were making for some friends but the daughters ran off into a corner with a handful nicked off the cooling rack. Stephen then discovered the container I had carefully hidden them in after a bike ride home but before supper. It took all three of us to tear them out of his hands which ended in hysterics because the girls thought they were rescuing the pennies for their own consumption. 

I didn’t use any dry mustard or cayenne which the cheddar variety like. I did use a healthy dose of fresh ground black pepper which when baked just added a toasty little kick. The pecans add a really great crunch to the pennies.

These are really good to make in advance. You can leave the dough in the fridge and just slice and bake before you need them. They also keep very well in an airtight container at room temperature after baking.

You really need these. Maybe as a foil to your New Year’s Eve tipple. I encourage you to enjoy them soon, before all your resolutions kick in and you can’t.

Stilton and Pecan Pennies

1 generous cup crumbled stilton

1/2 cup butter (if you use salted, don’t add salt, if you use unsalted, add the salt)

2 cups all purpose flour

1/2 cup chopped pecans

1/4 teaspoon salt

Fresh ground black pepper to taste

Mix all the ingredients together and add cold water by the tablespoonful until the dough just holds together (I used 2 tablespoons).

Divide the dough in two. Roll each half into a log about 1-inch in diameter and wrap in clingfilm. Chill for at least a couple of hours.  

Preheat oven to 400ºF.

Slice in 1/4-inch rounds and arrange on a parchment lined baking sheet. Bake for about 12 minutes or until they are golden on the bottoms and edges.

Cool and try not to eat all at once.

Tuesday
Dec072010

Pistachio and Cranberry Pesto (and eleven of its uses)

I was at the market on Thursday collecting our CSA and strolling around, as you do at the market. We stopped to buy some cookies, sublime chocolate chip and walnut, from an Australian stall holder who was selling a wide variety of things -bread and pasta, pesto and hummus, olives and nuts, cookies and cheesecake. After serving a very anxious Tilly, he proceeded to give a very indecisive woman the hard sell on his pasta and pesto combos. 

Now, I think fresh pasta is a delicious luxury and homemade fresh pesto equally so but, if I am going to buy pesto of any sort, it had better be damn good. My curiousity, and maybe his selling technique, got the better of me and I caved in for a taste. The choice was Poppy’s and she decided that we should try the pistachio and cranberry pesto. I dutifully tried to scoop up what looked like a fancy herbed dipping oil onto the bit of bread for a taste without much solid stuff sticking. It tasted fine, if you drizzled it over something maybe even a little yummy but not fantastic, not really fruity or nutty or anything. We didn’t buy it.

I decided to make it and would like to say that this is a little holiday kitchen workhorse for you. It is warm and wintery and fresh at the same time. It is so versatile that without even trying, I can think of a ton of uses. We have tried it three ways and we only made it after lunch today. 

So, you can, of course, use it stirred into some pasta. The girls devoured this perfect apres-swim supper this evening. You could also put it in a little jar and tie a pretty ribbon around it and give it to a friend. Add a beautiful goat cheese, if you really like this friend. You could use it to top roasted squash. And, in that vein, it could turn the sweet potato casserole on its head - mini marshmallows beware. You could roll it in some filo, with or without a little bit of cheese (think soft) and make very tasty little hors d-oeuvres. Try stuffing it into apples, baking them and serving with a pork roast. I like to muck around with the humble grilled cheese but I really, honestly think this would be divine spread inside with some really old cheddar. I think that this would be really nice alongside turkey, not traditional cranberry sauce but maybe a tasty new tradition. And, despite my disregard for it, I can’t help but quietly whisper roast lamb to you as well.

Stephen, for supper, had it stuffed into a chicken breast and roasted - it would have only been better had I taken a real chicken breast out of the freezer instead of a skinless one. Had it been a real chicken breast, ie. one with skin, I would have been inclined to just stuff the pesto under the skin. I, for a late lunch, had it dobbled over some fresh figs, a SoCal benefit, with a bit of shaved Parmigiano Reggiano. It disappeared rather quickly. 

I should mention a few things about making this. I would recommend buying shelled pistachios for two reasons. The first is that you can save yourself a lot of time, especially if you find yourself dropping whatever it is you are doing to rescue various parts of your house, furniture, sanity from your small child. The second is, that by the time you finish shelling them, especially with a little helper, you will have eaten half of what you bought. If you can buy them shelled, roasted and unsalted, even better. If not, buy unroasted and lightly toast and cool them before you start. Try as hard as you can, and buy unsalted ones.

If you go the shelling route, you will need to get some of the loose skins off. Do that by wrapping the pistachios in a clean towel and rubbing them. Then they should be less skinny and ready to go.

This makes about four cups of pesto which is quite a lot but you can keep it in the fridge in a jar covered with olive oil for a couple of weeks at least, if it was to last that long.

Pistachio and Cranberry Pesto

1 1/2 cups shelled unsalted roasted pistachios

1 cup dried cranberries

2 large shallots minced

4 cloves garlic minced

1/4 cup + 3/4 cup olive oil

1/4 cup lemon juice

1 cup parsley finely chopped

1/2 teaspoon salt

1/2 teaspoon ground black pepper

Sauté the shallots and garlic with 1/4 cup olive oil until translucent. Cool.

Pulse the pistachios in the food processor.

Pulse the cranberries in the food processor, or finely chop.

Put all the ingredients in a bowl and mix it up. Store it in a jar in the refrigerator until you find the next use. It won’t take long.


Friday
Sep172010

Warm Toasted Garlic and Lemon Vinaigrette and Some of Its Many Uses

Every now and then you realize that you have stumbled upon a culinary workhorse. It may, like in this case, be something that you have been using since the dawn of time. Or, at least since the dawn of your culinary exploration. It may be something that someone shows you and you suddenly realize that it has a multitude of uses.

It will most likely be simple. And, it should be made of things you would normally have on hand. Otherwise, what’s the use if you can’t just whip it up whenever you need it.

I have been using this warm, and impossibly simple, vinaigrette since I discovered the bounty of Provençal markets. It is perfect drizzled over a plate of sliced market fresh vegetables in any season. 

Poppy and I made a warm zucchini (courgette, for all you English folk) and summer squash slaw with some toasted almonds and tomatoes for lunch the other day and it was ‘exactly delicious’, as Poppy told me when asked how she thought it turned out.

Today, I was lucky enough to have five pounds of fresh scallops delivered to my door. I happened to mention it on Facebook and ceviche was suggested by Jason in reply. As today seemed to redefine grey, I thought that was a great idea to liven up the dreary moods moping around ours.

I was about to get into making it when I realized that I didn’t have any lime or any red onion or any fresh coriander/cilantro so I was going to have to wing it. 

I started to cut the scallops and decided to slice them very thinly instead. Then, as I was juicing the lemon, I remembered doing it the other day for the vinaigrette. All of a sudden I was digging a plate out and laying the scallops on it and getting everything ready to make the vinaigrette which was going to be drizzled over these scallops for a pretty decadent little rainy day lunch. Cue blue skies and sunshine.

Over the last few hours, I have decided that the possibilities for this little gem of a vinaigrette are almost endless - warm potato salad, drizzled over figs and goat cheese, a quick topping for a pasta. I think I could go on for a while here. I'd love to know if you find a use for it.

Warm Toasted Garlic and Lemon Vinaigrette

1 large clove of garlic julienned

Juice of 1/2 lemon

1/4 cup extra virgin olive oil

In a pan, heat olive oil. Add garlic and cook until it just starts to brown. This will happen quickly. Be careful not to burn it. Pour in lemon juice and stand back. When mixture starts to boil, this will happen quickly, remove from heat. Immediately drizzle over whatever you are drizzling it over.


Zucchini and Summer Squash Slaw (makes enough for 4 as an ample side dish)

1 medium zucchini

1 medium summer squash

3 small tomatoes quartered, seeded and julienned

1/2 small red onion thinly sliced

Handful of parsley leaves

1/2 cup slivered almonds toasted

Warm Toasted Garlic and Lemon Vinaigrette

Maldon sea salt and fresh ground black pepper to serve

Julienne the zucchini and summer squash or, if you have one, you can use a julienne peeler.

Put the zucchini and squash, tomato, onion and parsley leaves on a large plate or in a salad bowl. Drizzle the warm vinaigrette over. Toss to mix. Sprinkle the almonds almonds and some Maldon sea salt and black pepper on top. Eat.


Fresh Scallop Carpaccio (enough for 4 as a light appetizer)

1/2 pound fresh scallops with the tough ‘catch muscle’ removed

Finely chopped parsley

Fresh ground black pepper

Maldon sea salt

1/2 recipe Warm Toasted Garlic and Lemon Vinaigrette

Slice the scallops in 2-3 mm slices. Arrange on a serving plate, or on individual plates. Drizzle the hot vinaigrette over the top of the scallops. Top with parsley, salt and black pepper. Eat.

Yes, I do realize that there are now three scallop recipes here, here and here now but, hey, this is supposed to be about cooking in Nova Scotia. So, enjoy the bounty before I have to go somewhere else.